Monday, August 31, 2015

How to DIY Even If You're Terrified Of Power Tools


Cheap Power Tools For Sale
Maybe you're not terrified of power tools, but they scare you a little, they intimidate you, or you just plain don’t like using them.

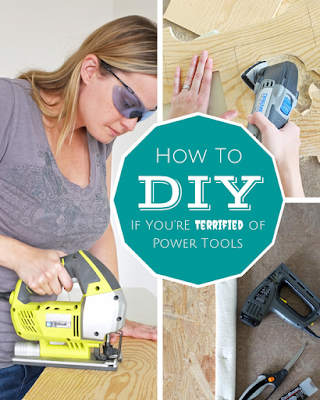
So, what do you do when you want to DIY a big project that requires power tools?

How to DIY When You’re Terrified of Power Tools

1. A tool is just that, a tool.

A means to an end. When it comes to tools there is the hard way or the easy way. The hard way is hand tools. They don’t make any noise, other than your grunting. They don’t require a plug or batteries. And they are far less scary. But the sweat equity you have to put in is what makes it the hard way. Then there's the easy way. It costs more upfront, still scares you a teeny bit even after a dozen uses, and the battery dies at the most inconvenient times. But power tools help you get tough jobs done quickly, more precisely, and with a lot less sweat (if we disregard nervous sweating).

2. Safety First

If power tools scare you, the best thing you can do is get comfortable before using them. Knowing how to operate a tool and understanding all of it's safety features will make you feel more at ease.

    *Read the manual cover to cover. I know you want to skip it, because all the warning signs and hazard symbols make you nervous. But those are the parts you should pay special attention to. The manufacturer has to warn you, but it doesn’t do any good if you don't read and understand the manual.
    *Take a free class or demo. Most home improvement stores offer free in-store workshops and demos, so you can learn about and try a new tool with an expert by your side. Seeing a demonstration, which will always include a safety segment, and getting to try a tool out in a low risk environment helps a lot.
    *Have a skilled friend or family member show you how to use a tool. Almost everything in the world is less intimidating if you've seen someone else do it first. Unlike seeing a tool on TV or YouTube, you can see, hear, and feel how the tool operates first hand…without volume control.

3. Don’t Do It Alone

Aren’t most things you are scared of our don't like better when you have someone else there with you? I personally feel a gazillion times safer when I am not alone with power tools.

When you need a break pass the sander to your friend. Give yourself a rest long enough for the sander-holding hand to stop shaking and get sensation back in the finger tips.

A second set of hands can also help you hold larger stock pieces, take over for a while and give you a break, and just be all around emotional and motivational support for the project you’re tackling.

With two or more people, take the Henry Ford approach…assembly line, baby! It won’t work for every project, but when it does work, it makes everything go by a lot faster.

    Set up stations for each of the tools needed for the project. Bonus points if you have a different person to man each station.
    Make all measurements (and double check them first).
    Make all cuts or pre-drill all holes at once.
    Install or assemble all the ready pieces.

4. Practice, Practice, Practice.

I know I made some mistakes early on which made me hate my tools more, because of the costly materials they I ruined. I should have started smaller and cheaper. Don't make your first cut with a saw on a piece of your new hardwood floor. Don't buy the best wood possible to make your first piece of furniture. Don't use a power nailer for the first time in a visible area that can’t be patched.

I love, and should have followed, Ana White's advice on getting starting. She recommends buying the cheapest wood available. She also has a set of “starter projects”.

Practice small to build up your confidence and skills before investing in good materials and tackling more complicated projects.

5. Get someone else to do it.

This is not wimping out. This is being realistic and true to yourself. If you hate power tools or still don't feel comfortable with them, get someone else to do the dirty work for you.

Here's 3 popular options:

    Have the hardware store make all your cuts at the store. Make sure you bring detailed and accurate measurements. Understand the store's cut policy. Some may charge per cut or limit the number of cuts they will make.

    Have a friend or family member do it for you. When I installed the cork floors in my basement, I did everything myself. The entire time I reminisced about installing the bamboo floors in my last house. we set my dad up in the garage with the Electric Saws. We measured and installed, he made every cut. We had another family member running planks up and down the stairs to the garage.

    Hire a handyman to do the work you don’t want to do. By DIYing part of the project and getting expert help on other parts, you can still save money over a completely done-for-you solution. We did this on a large scale in our basement. We opted for a semi-DIY approach to basement finishing. We contracted all plumbing, electrical, framing, and drywall. Leaving the stuff we didn’t mind doing, like installing light fixtures, painting, and installing flooring and trim.

Bottomline, if it's not for you, it's not for you. Just don't do it. Large builds are out for me. After a few failed attempts at building my own furniture from scratch, I am saying no to larger furniture projects, and that's okay. There are plenty of alternatives, starting with the tips above.

Thursday, August 27, 2015

How to Use Power Tool Safely


Most of us have operated a power tool at one time or another. They come in handy for a wide range of projects. It is very important that you always operate any power tool correctly. You should know exactly what it is to be used for, how it operates, and where the power switch is located in case you have to turn it off in a hurry.

Most injuries that involve power tools are the result of someone being inexperienced with that particular power tool or the tool being used for something it was not intended for. Take your time when you are operating power tools. Don’t let yourself become distracted. Always be aware of your surroundings and the potential for accidents and injuries. They can happen no matter how many times you have picked up that power tool and used it without incident.

Power Tool Cord Hazards:

Cords are a common hazard when operating power tools. They can get in the way and accidentally get severed. There is also the potential of tripping over them and getting injured. Make sure all power cords are secured and out of the area where you will be operating the power tool. Keep all cords out of water and away from solvents or you could get shocked or electrocuted.

If you have never operated a particular power tool before, take your time getting familiar with it before you even plug it in. Read the owners manual that comes with the power tool. Find out about the types of blades and other accessories that can safely be used with it. If the power tool comes with any type of safety guard, take the time to put it in place. You will find information in the owner’s manual regarding possible safety hazards.

Miss Use Of Power Tools:

No matter how tempting it may be, never use a power tool for a project that it wasn’t intended for. This includes trying to cut materials with a saw or saw blade that was not designed for it. Don’t alter a power tool to make it faster or to do something that it wasn’t designed for. You really don’t know the effect that is going to have on the operating capacity of the power tool.

It is never a good idea to operate any type of power tool if you have been consuming alcohol. Your perception will be off and you could end up with a very serious injury. Some prescription medications and over the counter medications can made you groggy or sleepy as a side effect. You should stay away from power tools while taking them as well.

Learn About The Power Tool:

Some people just don’t feel comfortable operating power tools. That is fine, and you shouldn’t feel forced into doing so. This is just opening the door for potential accidents to happen. If you are willing to learn to operate specific power tools that is one thing, but if you feeling pressured to do so you are going to have too much anxiety to operate it.

Using cheap power tools sale safely and under the right conditions will help reduce the possibility of any injuries occurring. They are a great way to get your projects and hobbies underway, but never forget the actual power behind them. The moving parts combined with that power can result in injury or death if you don’t follow the manufacturer’s instructions for operating them.

Wednesday, August 26, 2015

Power Tools Are Not Just for Men Any More


Cheap Power Tools SalePower tools now a days aren't just for men, that is a thing of the past. Women use power tools all the time now. The use of power tools by women has evolved as the family structure changed over time. Women have become more independent and the chores of the household have become less divided by gender. Single young women are now buying and fixing up their own homes.

While women can operate most any power tools, there are some out there designed specifically for women to use. Don’t worry, they aren’t all pink and cute! The Barbara K line features a cordless drill that is very light, yet very powerful. The cordless power screwdriver is the best selling power tool of the line. It is light weight and very easy to use.

The Unbelievable Saw is a hand saw for women that is great for cutting limbs.

This saw cuts Black and Decker Mouse Sanderwell and is simple to use. It is also light weight. Women enjoy doing home projects, and finding the right tool can be hard.Black and Decker offers the Mouse Detail Sander. This sander doesn’t weight much, fits in the palm of a lady’s hand, and fits in small spaces.

Wrenches can be difficult to maneuver in some areas. Craftsman has the Flex Wrench set in both standard and metric, with seven sizes of wrenches. They are great for getting into tight spaces. They also help give you some added strength to loosen or tighten anything.

A screwdriver is an essential tool for any woman to have. You never know when it will come in handy. Viper Tools have a 30 piece tool set with bag that is amazing. It has a button on the top so you can lock the head into position. The handle is designed for smaller hands and has a soft grip.

Pliers to extract nails makes them a piece of cake to remove. It also prevents you from cutting your hands up on any sharp ones. They work great of headless nails too. These pliers are easy to use and easy to grip. The jaws are designed to increase the amount of force on the nail if you encounter some stubborn ones.

Power tools for women that are designed to help them complete projects are anticipated to sell Pink Power 18 Volt Pink Drill and Cordless Screwdriverwell. Those manufacturers who take this market demand seriously are going to be able to profit from such products. The key is going to be conducting research and finding out what types of power tools women use and asking what they like and don’t like about them. Women don’t want just a smaller version of the power tools out there or the color changed to something pretty. They want power tools that are easy to use and get the job done.

Tuesday, August 25, 2015

Power Drill Buying Guide

The right drill can accomplish a lot around the home or workshop. Learn the available options and tips for finding the best drill for your work.

Power, mobility and weight are all considerations in choosing a drill.

Cheap Electric Drills For Sale
 A cordless drill offers high mobility and a wide range of available features. Voltage ratings of 4 to 8 volts are sufficient for light-duty cordless screwdrivers, but drills with 12 to 18 volts will meet most homeowners' work needs. A high-power model handles heavier work, but more voltage means the tool has a bigger, heavier battery. A cordless drill battery needs recharging periodically. You may want to have a spare battery available so you can keep working while you recharge. To compare the run times of batteries — how long they will be effective during use — look at amp-hour ratings. More amp-hours and more volts provide longer run time, but the battery charge level, material you're working with, level of continuous use and even temperature affect how long a battery lasts.

A corded drill offers high power and is lighter than a cordless model with similar capabilities. An amp rating represents the power of a corded drill. A steady power supply means greater run time and no need to stop to recharge a battery, but the cord does restrict mobility. Depending on how far your work area is from a power outlet, a corded drill may need an extension cord. Follow the manufacturer's instructions for selecting a proper cord and see Power Cord Safety Tips.
JINDING JD2150 750W 120V/230V 5/8'' Chuck Low Speed Electric Drill

Caution
Follow the tool manufacturer's instructions for use, maintenance and safety.

Good to Know
Common cordless drill battery types include nickel cadmium (NiCd or NiCad) and lithium ion (Li-ion). A Li-ion battery is lighter and smaller than a NiCd battery of the same voltage. Li-ion batteries can hold a charge for several months between uses.

Sunday, August 23, 2015

How to Buy Power Tools At a Pawn Shop

When you need a cheap power tools sale for the handyman or the craftsman in your family but your budget is limited, it is possible to find bargains if you know where to look. Ordinarily you would shop your local home improvement or hardware store for new tools. However, if you have a limited budget you can find good tools at the right price.

Instructions
Go directly to the tool department. It is easy to be distracted by the other items you find. Look at available tools carefully. Many times the tool is still in the original case. If you find something you want take it to the sales person and have them plug it in for a test. When testing power tools listen to it run. The motor should run smooth and should not miss, skip, or drag. If the sales person refuses to plug in the item you should find another PAWN SHOP. The item is suspect.

Power Tools 

Battery tools should definitely be tested before you purchase. If the BATTERY is not charged, have them charge it for you and make sure the charger goes with the tool. This assures you that the battery is good.

To purchase your item always try to get a reduction from the asking price. Most pawn shops will deal with you if an appropriate offer is made. You should ask for 10% less than the asking price. Although pawn brokers do not pay retail prices they must make a profit on the items they sell. You will be surprised at how much they will reduce the price if you ask.

Start shopping around for your POWER TOOL before you need to purchase so that you will be able to take your time and get the best deal. Pawn shops have many bargains if you shop carefully.


Thursday, August 20, 2015

Must-Have Tools for Beginning DIYers


If you've realized how incredibly expensive home improvement projects and furniture can cost, you have probably also realized just how much you can save by becoming a "do-it-yourselfer."  If you want to start DIYing your home and furniture projects, Remodelaholic is a great place to start!  The good news is that to become a DIYer, you don't have to have a fully functioning shop like you see on popular TV shows. You need a few basic tools to get you started.  

Bear in mind that every home should have good tools, but you do not need to buy a ton of expensive tools all at once. It is best to acquire quality tools as you need and can afford them. As a general rule, it is best to invest in well-made items that will last a lifetime.

With that in mind, here are the 10 tools we recommend to get you started on your DIY path:


three layer Metal toolbox tool storage box iron tool cabinet professional repair electrical tool box

1. A toolbox
A toolbox.  You will need a toolbox or tool bucket to keep your tools organized.  The more organized you are when tackling a DIY project, the more successful you will be.  Nothing will slow you down more than poorly organized tools!  Toolboxes range from large to small and portable. 

Multifunctional manual tool household portfolio hardware tool sets


2. Basic hand tools
You need basic hand tools, such as a hammer, pliers, screwdrivers and a utility knife!  There are some fabulous basic toolkits that you can buy to get you started quickly and easily.

18V 1500mAh Hand Cordless Drills Screwdrivers with 2pc Li-batteries 


 3. A cordless drill
The first power tool any DIYer should invest in is a cordless drill.   Cordless drills are convenient for working anywhere.  They not only drill holes and drive screws, but, with different bits, can stir paint and materials like thinset and concrete. 


DEWALT 2.4 AMP 14000OPM Durable Longer Life Sheet Palm Sanders


4. An electric random orbital sander.
All DIYers find themselves sanding...a lot.  To avoid doing it all by hand, you will need an orbital sander.  They are not very expensive, and are worth every penny.


DEWALT 1200W 5500rpm 48° 184mm Accurate Cutting Compact Circular Saws


5. A circular saw
As a DIYer, you will find that there is no saw that is more versatile than a circular saw.  It can take the place of a table saw, if you use it in a conjunction with a straight edge. 


Aluminum Angle Slope Finder Laser Level Spirit laser Level 200mm


6. A level
From hanging pictures to building furniture, you have to make sure your work is level.  So, to start with, we would recommend a 9 inch level.  As you continue down your DIY path, you will eventually want a 24 inch level as well.


7. A 6-inch combination square
A 6-inch combination square is so versatile.  In addition to using it to check for square, you can use it as a straight edge when you are cutting 2 x 4s or 2 x 6s.  It is also an excellent marking tool--you can use it to mark things like angles and the position of hinges.


8. A stud finder
A stud finder.  Hanging something heavy?  You will need to secure it to a stud in the wall in order to avoid disaster.  A stud finder will help you find your studs so that you can safely secure shelves, cabinets, expensive TVs, etc. to your wall. 


Professional Heavy Duty Pneumatic Tapler, Air stapler Staple Gun, Pneumatic Nail Gun


9. A staple gun
Staple guns are inexpensive but are incredibly versatile.  You can use a staple gun for everything from upholstery to making a simple greenhouse with a wood frame with plastic sheeting stapled to it. 


10. A putty knife
A putty knife.  Last on the list, but certainly not least, is a putty knife.  The putty knife, of course, is routinely used for spreading putty when patching holes in walls.  But it can also be used to scrape off old paint or glue residue, pry up nails and remove wallpaper.  You may want to start with a set of three putty knives for the most versatility.

With these tools in your arsenal, you will be an unstoppable DIYer in no time!  Looking for more power tools, hand tools, measuring tools at www.eastmachinery.com.

Wednesday, August 19, 2015

Tips for Choosing the Right Size Grinder


Prescott 2000W 180mm Drill Capacity Electric Angle Grinders
A decent angle grinder is a basic component of any handyman’s toolbox. There are few tools more versatile than a grinder, which combines a spinning wheel and a sturdy handle in a handheld package for cutting, polishing, and everything else in-between. Woodworkers use grinders for sanding while metalworkers use them to make repairs. Not all grinders are made equally, however, and for many homeowners who wandered into the tool aisle of their local home improvement store, trying to pick the right one off the shelf presents a challenge.

Try to avoid buying a grinder without doing the proper research. Instead, check out the different grinder features both in the store and at online websites like eBay that have grinders for sale. Choosing the right grinder size depends on several factors, but it is arguably the most noteworthy feature of the grinder. This guide provides five tips for choosing the correct size grinder for any job.

Tip 1: The Bigger the Grinder, the Better it is for Large Jobs

It is surprising how many handymen do not understand that a grinder’s size is determined by its discs, not the length of the overall machine. While it is true that grinders with bigger wheel discs are longer than their smaller counterparts, this is because a bigger handle is needed to control the wheel. For example, a 4.5- inch angle grinder is the most common size, and brands like Kawasaki and Ryobi are popular with homeowners. It uses wheel discs that are 4.5-inches in diameter. A 7- inch grinder uses a 7- inch disc, and so on. Understand that the bigger sizes use larger wheels. Wheel size is particularly relevant for large jobs. If a homeowner only occasionally uses a grinder for odd cutting jobs around the house, then purchasing a smaller size works well. A 5- inch grinder can cut through several feet of wood in no time at all. However, using that same grinder on a large project like cutting beams for a deck would quickly become a chore. Professionals often choose larger grinders because they can work quickly on monster jobs.

Tip 2: Bigger Wheels Make Deeper Cuts

Grinder sizes are especially pertinent once materials are taken into consideration. For example, grinders of any size can cut through wood, though smaller grinders will get into trouble with especially thick pieces. However, not all grinders can handle durable materials like stone and concrete. Not only are they incredibly strong, they also tend to be thick. For example, a concrete slab can easily be three inches wide. A 4.5 angle grinder has a blade that is 4.5-inches in diameter, which means the blade extends 2.25-inches from the center in each direction. Therefore, it is not physically able to cut through 4 inch concrete. Choose a larger grinder when deep cuts are needed, such as a 9- inch grinder, the blade of which extends 4.5 inches from the center.

Tip 3: Smaller Grinders Spin at Faster Speeds

A smaller circle with a tiny circumference will spin at faster speeds than a large circle with a greater circumference: the basic principles of physics. In fact, it’s not unusual to see 4.5-inch grinders top out at speeds over 11,000 RPM. This is what gives these tiny grinders the power to cut and polish metal. However, it is also the reason why smaller grinders are more susceptible to overheating than their larger counterparts. If a 7-inch grinder is spinning at speeds of 5,000 RPM while it is sanding a floor, its greater design and slower speed is generating less heat than a 4.5-inch grinder spinning away at 10,000 RPM. Yes, the greater speed gives the grinder more power, but it also makes it easier to fail. In fact, most experts recommend buying a smaller grinder that comes with adjustable speed settings so the user is not constantly operating on the highest setting. After all, if the job is forcing the worker to use the highest speed possible, it’s better to set the smaller grinder aside and pick up a larger one.

There is one caveat to this general tip. Grinder speed is also determined by the amp rating of the motors. While it is often the case that a 4.5-inch grinder is going to be faster than a 6- inch grinder, the buyer needs to also pay attention to the motor. A 6-inch grinder using a motor that produces 13 amps is going to be just as fast, if not faster, than the 4.5-inch grinder with a 7 amp motor. Always look at the RPM rating and never assume that just because a grinder is smaller it is automatically faster.

Tip 4: Not All Grinders are for Novices

Grinders are discount Power Tools online that use heavy-duty metallic discs spinning at impressive speeds. Also, most of these discs use sharp edges or grinding grains, and it is easy to see why they can be potentially dangerous. Smaller grinders are easier to control due to their smaller wheel size and users often operate them with just one hand. Even so, these small grinders hold a lot of power, so it best to always wear safety equipment like a face plate in case the grinder shoots out debris. Gloves are also recommended because the rapidly spinning disc creates a lot of vibration along the handle of the angle grinder. It’s best to start out with the smaller grinders and get a feel for how to use them before advancing to the larger ones.

Professional grinders come in serious sizes like the 7-inch grinder. Users need to operate this grinder with both hands. In fact, it is so strong that it is almost impossible to control in just one hand. Safety equipment at this stage is essential, though it may do the user no good if the grinder kicks back. Since grinders operate at such high speeds, they often lead to serious accidents. For example, the 9-inch grinder that is still made by brands like Makita was once popular in industrial workplaces, but its gigantic size caused many accidents. Today, many industrial complexes outlaw using 9-inch grinders. The big grinders are no place for a novice to begin learning grinder operations.

Tip 5: Smaller Grinders are Cordless

Cords, while they may be irritating, may be a necessary part of power tools. Nothing is more annoying than crawling into a tight workspace to grind pipes only to realize the cord simply doesn’t reach. Not only are large grinders big and bulky, they often come with heavy duty motors that use 240 volts or 110 volts. This means they need a cord that gives them a constant supply of power. Smaller grinders commonly use a more reasonable 18 volts of power, which allows them to work on a rechargeable battery. Many are cordless . Keep this in mind when selecting a grinder.

cheap Electric Angle Grinders for sale

Get more information about cheap electric angle grinders for sale at www.eastmachinery.com.
Electric Angle Grinders

Build A Rope Wall


I've been helping out Shelly Leer – aka ModHomeEc – with the design of her brand new upholstery workshop in Indianapolis. Shelly is a fantastic upholster and hosts classes to teach folks the ins and outs of fixing up and reupholstering their old forlorn stuff (a skill I can really appreciate).

With this open warehouse space, one big design issue Shelly needed help with was figuring out how to layout and define areas for various work and private “zones”. She needed areas for tools, areas for storage, an area for a personal office, a waiting area, an area to teach and work with students and so on and so forth. Functionally, this one big room had to be used for many many purposes and still be open, accessible and of course look awesome.

Since cost is always an issue (and this space is a rental), it wasn’t prudent to dump a bunch of cash into building traditional solid walls that would split up the space and make it feel smaller and darker. My solution was to build these vertical jute rope division walls that allowed for defined “zones” but still retained light and visibility throughout the entire space. A plus when using this type of jute rope is the added benefit of bringing in a chunky / graphic / warm texture to an otherwise cold and hard industrial room.
Power Tools For Sale


The construction process is pretty simple. Wood boxes were custom built with evenly spaced rope sized holes drilled through the top and bottom. Precut sections of rope were strung through the top and tied off at the bottom, allowing for the interior knot to hold the rope in place and taut. Just screw close the open side of the box and all those ugly knots are hidden away.

With this design the overall costs are kept pretty low for such a big impact. Rope is cheap, especially when bought in bulk, and wood boxes are very low cost to build. The true cost is going to be labor and time – it’s just a tedious and super repetitive process.


Come on. Hotness.

I think the outcome is pretty spectacular. Not that I’m bias or anything.


This roped off area is actually Shelly’s office!

I’m completely thrilled with how these rope walls came together and so happy I didn’t have to lift a finger and do any of the actual labor. There is another wall in the works that I’m pretty excited to see completed as well as other awesome ideas that came from designing Shelly’s new workspace to be affordable, functional and downright ‘effing stylish.

Looking For Cheap Power Tools Sale on www.eastmachinery.com

Tuesday, August 18, 2015

Guy Accidentally Heard Teens Making Fun Of 75-Year-Old Man’s House, So This Is What He Did

When railroad track inspector Josh Cyganik of Union Pacific heard local kids making rude comments about 75-year-old Leonard Bullock’s home, he decided that he had to do something about it. On July 15th, he posted this message to Facebook:

“…I was at work a couple weeks ago and I heard 2 teenage boys walked by this old man’s house…[and] they said loud enough for me to hear ‘look at this crappy house they just need to burn it down’!… So I’m asking if anyone that wants to help this Saturday to volunteer their time to help paint this gentleman’s house!”

The response was stunning. “I stopped counting at 95 volunteers, but everyone showed up excited and willing to help.” People came from as far as Texas, Washington, and California to help out. When asked for a comment by the Daily Mail, Cyganik said, “According to the media, I’m a hero. I’m not a hero, I just heard something that bothered me.”

Cyganik overheard teens say, “look at this crappy house, they just need to burn it down!”

He posted to Facebook asking for volunteers to help fix it up, and the response was astounding

People started to show up from as far away as Texas, Washington, and California

“I stopped counting at 95 volunteers, but everyone showed up excited and willing to help”

“I was raised to respect the people who came before you, to help others out who don’t have much”

Here’s the final result! 


Sunday, August 16, 2015

'Star Wars' speeder-bike rocker built by awesome dad


A young girl gets the gift of a lifetime when her "Star Wars"-fan dad makes a custom rocker in the shape of a speeder bike. Instructables has the guide.

 Somewhere out there on Planet Earth, there is a 1-year-old Jedi princess sitting atop her mighty speeder bike, gleefully rocking back and forth, a "Star Wars" fan-in training.

The creation is a gift from her dad, who had the patience and skill to craft a custom rocker that looks like it flew straight out of the forests of Endor.

Australia-based Instructables user Tez_Gelmir built the Rocking Speeder Bike from plywood, PVC and 3D-printed parts. Strength and stability were at the top of his mind for the build. "The need to be strong enough to handle a beating led me to the first part of my design, a rigid backbone with a solid plywood top for the seat platform," he writes.

The design is based on an original concept drawing for the speeder bike from the movies, most famously the forest chase scene in "Return of the Jedi." The step-by-step Instructables guide goes into great detail on the build. Templates and tips will help other fans build their own rockers for their own offspring. It helps if you already have some advanced woodworking skills and a 3D printer handy.

 The rocker doesn't just sway back and forth and look pretty. It also has a light-up blaster cannon underneath that glows red as you imagine chasing your prey at top speed. Tez_Gelmir used an Arduino system to create the blaster cannon, which also has sound effects. The weapon is triggered by a button on the rocker.

A video of the rocker in action shows a thrilled young girl taking it for a ride while sporting a Princess Leia costume. The Rocking Speeder Bike project deserves every "Star Wars" cliche we can throw at it: The Force is strong with this dad. Use the rocker, Leia. Rock or do not, there is no try. This is the furniture you're looking for.

For more information about cheap power tools and 3D Printer visit www.eastmachinery.com

Friday, August 14, 2015

How to Build a Desk Out of Cabinets

How to Build a Desk Out of Cabinets With kitchen remodels happening all the time, many old cabinets are either thrown away or donated. Instead of tossing them out at the thrift store, repurpose them into a portable desk for your elementary-aged child. This desk provides a large work surface, a chalkboard, a storage compartment for papers and books, as well as holders for all kinds of school supplies.

Things You'll Need

*Phillips screwdriver
*Needle-nose pliers
*Measuring tape
*Circular saw
*Cabinet with one door and one drawer
*Mallet or hammer
*One-by-three pine board, 100 inches or enough for perimeter of cabinet face
*Cordless drill/driver
*Pocket hole joinery system
*Wood glue
*1 1/4-inch pocket hole screws
*1/4-inch plywood, cut to dimensions of cabinet face
*1/2-inch long nails (if using nail gun, use 18 gauge)
*Pneumatic or electric nail gun (optional)
*Pencil
*Small plastic cups, 4
*Self-feed drill bit, 1-inch diameter
*Jigsaw
*Wood clamp
*Wood filler
*Sandpaper, 150 and 220 grit
*Orbital sander (optional)
*Router with router table (optional)
*1/2-inch core-box or round nose router bit (optional)
*Cabinet knob, 1 (optional)
*Table leg straight top mounting plate, 2 1/2 inches wide, 4
*Wooden furniture feet, 4 inches tall, 4 (can use taller feet, depending on preference)
*2-inch paintbrush
*Paint + primer latex paint, white, semi-gloss
*3-inch foam roller brush
*Chalkboard paint
*Small tin buckets, 4
View or buy these items on Eastmachinery.com

Step 1: Disassemble the Cabinet

Using a mallet or hammer, remove the back of the cabinet from the cabinet face. If drawer slides are attached to the cabinet face inside the cabinet, remove them with a Phillips screwdriver. Use the mallet to loosen the sides and bottom of the cabinet from the cabinet face, as well as the drawer sides and bottom from the drawer face. Needle-nose pliers may be used to remove any staples. Remove pulls or knobs with a screwdriver.


Step 2: Build the Desk Base

Measure the length and width of the cabinet face. Using a circular saw, cut a one-by-three pine board into two long pieces that are equivalent to the length of the cabinet face and two short pieces that are 1 1/2 inches shorter than the width of the cabinet face. For example, the cabinet face used in this tutorial is 31 inches long and 21 inches wide. Two boards were cut at 31 inches and two boards were cut at 19 inches. Adjust these measurements depending on the size of your cabinet face.

Drill 3/4-inch pocket holes along the long pieces of wood, spaced about 4 to 5 inches apart. Drill 3/4-inch pocket holes along the long side of the short pieces of wood, and then two pocket holes on either end. Use wood glue and 1 1/4-inch pocket hole screws to screw the short boards to the inside of the long boards so that a box is formed.

  
Step 3: Attach Desk Base to the Cabinet Face

Using 1 1/4 inch-pocket hole screws and wood glue, attach the desk base to the underside of the cabinet face. Work slowly and do not drive the pocket hole screws too deep so they poke out the other side. Then cut a piece of 1/4-inch plywood to the same dimensions as the cabinet face and attach it to the underside of the desk base with wood glue, 1/2-inch nails and a hammer, spacing nails every 3 inches along the perimeter. An optional alternative to the hammer and nails would be to use a pneumatic or electric nail gun and 18 gauge 1/2-inch nails.

Step 4: Make Holes in the Drawer Face

Using cups or small tin buckets as a template, trace four evenly-spaced circles on the drawer face. If tracing from the base of the cup or bucket, draw the circle about 1/2 inch larger than the actual diameter. Drill holes along the edge of the diameter of the circles with a 1-inch self-feed drill bit, and then use a jigsaw to slowly cut along the perimeter of the circle. Repeat for the remaining three circles.

Tip
While drilling holes and cutting circles in the drawer face, a large (3 inch or thicker) piece of polystyrene can be used to work on top of. The polystyrene will not affect performance of the jigsaw and is sturdy and hard enough to provide adequate support to the drawer face while making the cuts.


Step 5: Attach Drawer Face to the Cabinet Face

Place glue along the underside edges of the drawer face and carefully position it on top of the cabinet face over the drawer opening. Use a measuring tape if necessary to make sure placement is even on all sides. Clamp the drawer face to the cabinet face and let it dry overnight.

Step 6: Attach Knob to Cabinet Door or Route the Edge

If the cabinet door sits flush with the cabinet face when closed, a knob will need to be attached to easily open the desk. Measure, mark and drill a hole in the center long edge of the cabinet door (the unhinged side) so that it will not interfere with left- or right-handed children. Attach the knob.

Another option is to route the long edge of the cabinet door so a lip is formed for easier opening of the desk. To do this, position the router table guide at 0 inches so half of the round nose bit cuts into the edge of the door. Remove the screws from the hinges on the cabinet door and slide it along the router table, following the manufacturer's instructions. Once the door has run through twice (to ensure an even cut along the entire long edge), sand the cut edges with 220 grit sandpaper to remove splinters.

Step 7: Fill Holes and Sand the Desk

Use wood filler to fill the holes from the cabinet pull, seams and places where the desk base join with the cabinet face. Let it dry for several hours. Sand the pre-finished cabinet door, drawer and base with 150 grit sandpaper by hand, or use an orbital sander to remove the protective finish and make it easier for paint to adhere to the surface. Sand the areas where wood filler was used and all edges with 220 grit sandpaper to ensure there are no sharp corners or splinters.


Step 8: Attach Feet to the Desk

On the four corners under the desk base, mark and pre-drill holes for the table leg straight top mounting plates. Attach the table legs into place using the screws provided with the mounting plates. Be sure to screw in the legs until tight. 

Tip
A hole for the inside corner of the plate does not need to be drilled, as it is not needed for stability and the screw would puncture through the other side of the plywood, making a sharp point coming through the inside of the desk.


Step 9: Paint the Desk

Use a 2-inch paintbrush and white latex paint + primer in semi-gloss finish to paint the entire desk, except the center of the cabinet door. Apply two coats and let dry completely. Use a 3-inch foam roller brush to paint the center of the cabinet door with chalkboard paint. Apply two to three coats and let the desk dry for 24 hours.


Step 10: Place Small Tin Buckets in the Holes

Place small tin buckets or cups in the four holes that were cut out earlier, and fill with crayons, pencils, chalk, scissors or other school supplies.

Tip
To season the chalkboard before use, fill in the entire chalkboard surface with white chalk and then wipe off. This prevents marks from first-time use from remaining visible after being wiped away.

This desk provides great storage for all school supplies, keeping it organized and accessible. The sturdy surface and solid construction will last for years, while the portability means it can be used on the floor, sitting on a couch, or in a bed.

Wednesday, August 12, 2015

DIY Home Improvement Excuses Are No Longer Going To Hold You Back From Doing Good Work

Some believe a home is always an unfinished project. Some homeowners have the enthusiasm to make the home perfect whereas some rely on excuses to not take up DIY home improvement projects. The fact is people who give excuses are just finding ways to postpone these projects. It is fine to postpone some projects, but there may be a few tasks that need immediate attention. For example, if a nail is sticking out of a cabinet, or a chair has a loose leg or a shelf is drooping on one side or a pipeline is clogged. Such tasks need to be tackled at the earliest and there is no reason to avoid them.

If you still managed to come up with the classic three excuses, we have the answer to all three of them:

“I lack the talent to do justice to the task at hand”

Not having experience at some activity has never stopped you from trying things out in the past.  Be it trying out some new food or learning some new sport. DIY projects are exactly the same. You may not get them right the first time, but there is always room for improvement. You can keep taking up new projects to improve your skills. After all, only practice makes one perfect.

These days, a lot of tutorials are easily available online, all thanks to the latest advancement in technology. Some of them are illustrated through photographs, whereas some even have videos. All you have to do is understand the task and try it on your own. It is really not about the talent. It is more to do with being patient and showing perseverance. As you practice your skills, you get better with experience. If you feel DIY household projects are meant for crafty households, then you are mistaken. It is for everyone and anyone who shows interest.

“Where do I get the time from?”

You don’t get time; instead, you have to make it. We agree, some DIY household projects may take up more time than expected but most projects are small enough to be tackled over the weekend. To save up on time, you can understand the project over the week and watch some tutorial videos as well. Next you can even keep the materials ready so that on the day that you actually undertake the project, you can finish it in the least amount of time. Furthermore, you can always ask your family to help you out. If you get stuck with something, you can go online and ask for help from DIY communities.

“I have a budget constraint”

If you are tight on budget, it even makes even more sense to take up handy, crafty DIY household projects. Rather than calling in a handyman, you can do it yourself and save a few bucks. Also, if you tackle the repairs from an early stage, you can avoid bigger expenses in the future.

Complaining about investing in a lot of tools isn't fair. You can make smart choices by purchasing an oscillating tool that can perform multiple tasks. Multiple usage cheap power tools sale can do all those jobs, which would otherwise require five to seven different tools. Thus, it is all about buying smart tools and borrowing the rest from friends.

So now that all your excuses have been taken care of, you have no reason to actually not take up a good DIY project. Get the gears rolling and plan your next project well in advance so that you have something good to show to everyone around you.

What Tools are Women Looking for Today?

The popularity of the Home & Garden TV Network (HGTV) and the Do It Yourself Channel (DIY) demonstrates how many women are taking on home improvement projects, and not just the easy ones.   Women have become much more adept at using cheap Power Tools for sale, air tools, all types of saws, and even plumbing and electrical tools.   Tools are an important aspect of women being able to handle these renovation projects and complete them like a “pro”.   Besides watching television shows, many women are seeking the assistance of the local home center or hardware stores, and consulting friends or reading books, in order to improve their skills.
Women with Electric Drills

When it comes to retailers, shopping in a home improvement center was described as “easy” by nearly one-third of respondents, while one-quarter deemed it “more fun than food shopping.”   Home improvement stores received high marks for their marketing efforts and treatment of women; with 64% of respondents saying the stores did a good job overall. Home improvement stores like Lowe’s and Home Depot are getting in on the action by providing in-store workshops to women. These workshops demonstrate what materials and tools are needed for how-to projects. Television programs and workshops help women become more knowledgeable about tools so they know what items to purchase.

This year (2011), Home Depot is recognizing that while women may be half of its customers, it has not catered to them in ways that translate into a larger market share.    ”People are starting to spend more money again, and we need to participate in that,” said Gordon Erickson, the senior vice president for merchandising and décor at the Home Depot.

“For years, we’ve always had a bad — I don’t want to say a bad reputation, it’s more that people look at our business and think it is male-oriented, dominated,” Mr. Erickson said. “Fifty percent of our customers are female. We need to offer her products that she wants.”

Because of the accelerated interest women have in becoming “do-it-yourselfers”, lines of tools have been created specified to fit them more comfortably.    Some tools designed for today’s women include:

    16 oz. curve claw hammer with a smooth head. This all-purpose hammer is not too heavy on a woman’s wrist, but heavy enough so a woman can do the job right.
    25-foot tape measure. Its width makes it easy to read the numbers and it doesn’t bend when pulled out a few feet.
    10-inch tongue-and-groove pliers. This tool easily controls plumbing fittings and nuts.
    Retractable utility knife with blade storage in the handle. This tool is used for cutting everything from vinyl tiles to drywall. The blade is easy to replace and stores in the handle for safety.
    Ratcheting discount Electric Screwdrivers online with multiple bits. The multiple bits change out easily, depending on if a small or large Phillips or a slotted head is needed. The ratcheting action allows you to keep a steady pressure on the head of the screw while simply twisting the handle in place.

Monday, August 10, 2015

Women Are Making Their Mark on Home Improvement

Women have made their mark in the world of home improvement and repair.   Today, inverter for power tools are being developed that make women feel inspired and empowered.   This is a direct result of the number of women who have taken on their own home improvement and rennovation projects, and who are purchasing home improvement products.   The Wall Street Journal reports that women are buying 61% of major home fix-up products and, according to Forbes, women initiate 80% of all home-improvement purchase decisions, especially when it comes to big-ticket orders like kitchen cabinets, flooring and bathrooms.

Overall, women account for more than $70 billion worth of purchases in the home improvement industry, up from $55 billion in 1995 (according to a recent survey by the Home Improvement Research Institute).  This rising trend is due to women tackling home repair projects on homes they own themselves. In fact, within the first year of home ownership, women spend almost $9,000 on home improvement projects. Contributing to the growing trend of women purchasing cheap power tools sale are home improvement shows and hardware stores catering to women shoppers.

“Women are very influential and powerful consumers when it comes to home improvement projects around the house,” said Rob Cappiello, industry vice president of the National Hardware Show. “In addition, single women are purchasing new homes at twice the rate as single men, which contributes significantly to their increased involvement in do-it-yourself home improvement projects.”

Single women are now the second-largest group of home buyers in the U.S., after married couples, according to the National Association of Realtors (NAR). Women are now responsible for 21% of home purchases, says the NAR, and at the end of 2010, women-headed households   represented approximately 28% of the U.S. total, or 31 million.

What Renovation Projects Interest Women?

Although many people still consider home improvement projects to be a man’s job, three-quarters of American women ages 25 to 49 say they are doing more home-improvement projects today than five years ago, and a solid 80% plan to tackle at least one home-related project in the next year.  In a national telephone survey conducted by Opinion Research Corporation on behalf of Scott Towels by Kimberly-Clark, the #1 reason women took on home improvement jobs was to save money.   Personal pride and satisfaction was the second most important reason.

Hands-down, the most popular home improvement projects for women are:

    Painting                                                                      86%
    Bathroom remodeling                                               38%
    Wallpapering                                                             35%
    Plumbing                                                                   30%
    Kitchen remodeling                                                   29%
    Tile work                                                                    28%
    Additions or renovations                                           27%
    Electrical work                                                            23%
    Laying carpet                                                              18%
    Window replacement                                                 14%

Sunday, August 9, 2015

How To Build The Perfect Pergola!

Building a pergola in your yard is a major DIY project, but adds value to your home, as well as to your garden enjoyment. Adding shade and structure to the garden, a pergola differs from an arbor in that is is usually a more “room like” structure, with posts supporting a roof covering of some type. In other words, an arbor on steroids. Perfect for creating romantic walkways, adding a seating area, or making a portion of the garden a major focal point. If you can dig a post hole and handle a drill and a saw, you can build a pergola with these DIY tutorials! So start planning, an as soon as the weather allows, set aside a weekend to build a pergola for your garden!

Another pergolas… See, you can do this!

cheap electric drills for sale


And finally, if you need some cheap power tools for sale for your pergola, you can visit our online store www.eastmachinery.com, the largest global online trading platform for machinery.